


【检修知识】本田新CR-V影音导航装置教程
本篇文章5383字,读完约13分钟
2.先拆下空调控制模块
600) Makesmalpic(这个,600,1800);height = 415 src = " ephua/upload _ files/article/39/1 _ olj 0 eyun titled-2 _ clip _ image 004 _ 0000 . jpg " width = 553 onload = " if(this . width/> 600)makesmalpic(this,600,1800);"border=1 >

3.拔下空调控制模块的电源线
600) Makesmalpic(这个,600,1800);height = 415 src = " ephua/upload _ files/article/39/1 _ bm9n 06 mjgjd _ _ untitled-2 _ clip _ image 006 _ 0000 . jpg " width = 553 onload = " if(this . width/> 600)makesmalpic(this,600,1800);"border=1 >

4.然后用塑料刀
600) Makesmalpic(这个,600,1800)松开中控台上方的盖撬;height = 415 src = " ephua/upload _ files/article/39/1 _ i1 dy 30 dfo 2j _ _ untitled-2 _ clip _ image 008 _ 0000 . jpg " width = 553 onload = " if(this . width/> 600)makesmalpic(this,600,1800);"border=1 >

5、然后拆下中控台上方的盖子
600) Makesmalpic(这个,600,1800);height = 415 src = " ephua/upload _ files/article/39/1 _ voqkvvmtw 9y _ _ untitled-2 _ clip _ image 010 _ 0000 . jpg " width = 553 onload = " if(this . width/> 600)makesmalpic(this,600,1800);"Border=1>
6、然后用胶刀撬开中控台出风口
600) Makesmalpic(这个,600,1800);height = 415 src = " ephua/upload _ files/article/39/1 _ xmzf 9 en titled-2 _ clip _ image 012 _ 0000 . jpg " width = 553 onload = " if(this . width/> 600)makesmalpic(this,600,1800);"border=1 >

7.拆下出风口
600) Makesmalpic(这个,600,1800);height = 415 src = " ephua/upload _ files/article/39/1 _ 4 HD 8 okbyxxo _ _ untitled-2 _ clip _ image 014 _ 0000 . jpg " width = 553 onload = " if(this . width/> 600)makesmalpic(this,600,1800);"border=1 >

8.中控台的一些配件去掉后,还剩下原来的音响主机
600) Makesmalpic(这个,600,1800);height = 415 src = " ephua/upload _ files/article/39/1 _ xymldwfn 7 HF _ _ untitled-2 _ clip _ image 016 _ 0000 . jpg " width = 553 onload = " if(this . width/> 600)makesmalpic(this,600,1800);"border=1 >

9.用螺丝刀
600) Makesmalpic(本,600,1800)拆下原主机的固定螺丝;height = 415 src = " ephua/upload _ files/article/39/1 _ clsjdtsllps _ _ untitled-2 _ clip _ image 018 _ 0000 . jpg " width = 553 onload = " if(this . width/> 600)makesmalpic(this,600,1800);"border=1 >

10、主持人拿出
600) makesmalpic(这个,600,1800);height = 415 src = " ephua/upload _ files/article/39/1 _ ztya 9 cotemw _ _ untitled-2 _ clip _ image 020 _ 0000 . jpg " width = 553 onload = " if(this . width/> 600)makesmalpic(this,600,1800);"border=1 >

1.拔掉原主机电源及其线束
600) Makesmalpic(这个,600,1800);height = 415 src = " ephua/upload _ files/article/39/1 _ puasedv 8 h0 w _ _ untitled-2 _ clip _ image 022 _ 0000 . jpg " width = 553 onload = " if(this . width/> 600)makesmalpic(this,600,1800);"Border=1>
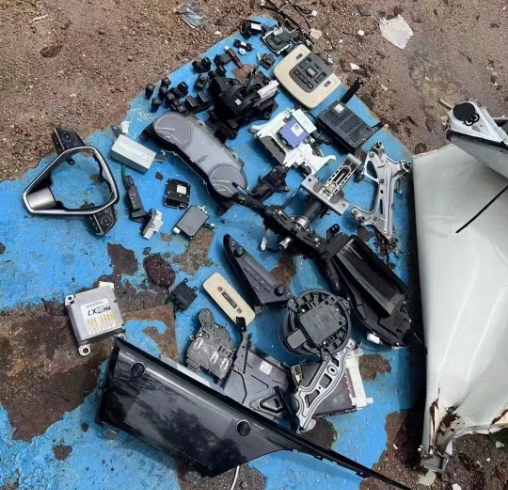
12、主机原主机取出后的效果如图
600) Makesmalpic(这个,600,1800);height = 415 src = " ephua/upload _ files/article/39/1 _ oaysewci 8nm _ _ untitled-2 _ clip _ image 024 _ 0000 . jpg " width = 553 onload = " if(this . width/> 600)makesmalpic(this,600,1800);"border=1 >

13.安装格非原配电线
600) makesmalpic(本,600,1800);height = 415 src = " ephua/upload _ files/article/39/1 _ sxta 9 gby 9 xf _ _ untitled-2 _ clip _ image 026 _ 0000 . jpg " width = 553 onload = " if(this . width/> 600)makesmalpic(this,600,1800);"border=1 >

14.安装格非主机接线
600) Makesmalpic(本,600,1800);height = 415 src = " ephua/upload _ files/article/39/1 _ ycqzwbqw1 ke _ _ untitled-2 _ clip _ image 032 _ 0000 . jpg " width = 553 onload = " if(this . width/> 600)makesmalpic(this,600,1800);"border=1 >

15.格非主机配专用支架
600) Makesmalpic(这个,600,1800);height = 415 src = " ephua/upload _ files/article/39/1 _ qimfevc 0 ea 3 _ _ untitled-2 _ clip _ image 034 _ 0000 . jpg " width = 553 onload = " if(this . width/> 600)makesmalpic(this,600,1800);"border=1 >

16.安装电源及其线束
600) Makesmalpic(本,600,1800);height = 415 src = " ephua/upload _ files/article/39/1 _ jy 4 gaorf 4kz _ _ untitled-2 _ clip _ image 036 _ 0000 . jpg " width = 553 onload = " if(this . width/> 600)makesmalpic(this,600,1800);"border=1 >

17.连接i pod线和usb线的放置
600)makesmalpic(这个,600,1800);height = 415 src = " ephua/upload _ files/article/39/1 _ twybd 2 vov 4 l _ _ untitled-2 _ clip _ image 038 _ 0000 . jpg " width = 553 onload = " if(this . width/> 600)makesmalpic(this,600,1800);"border=1 >
18.在安装格非主机之前,先测试一下各个函数
600) Makesmalpic(这个,600,1800);height = 415 src = " ephua/upload _ files/article/39/1 _ 7 ex 2 kaun titled-2 _ clip _ image 040 _ 0000 . jpg " width = 553 onload = " if(this . width/> 600)makesmalpic(this,600,1800);"border=1 >

19.调试倒车摄像头
600) Makesmalpic(这个,600,1800);height = 415 src = " ephua/upload _ files/article/39/1 _ eyjttxuuaue _ _ untitled-2 _ clip _ image 042 _ 0000 . jpg " width = 553 onload = " if(this . width/> 600)makesmalpic(this,600,1800);"border=1 >

20.功能测试结束后,安装格非主机
600) Makesmalpic(这个,600,1800);height = 415 src = " ephua/upload _ files/article/39/1 _ me 0x snvrh 7j _ _ untitled-2 _ clip _ image 044 _ 0000 . jpg " width = 553 onload = " if(this . width/> 600)makesmalpic(this,600,1800);"border=1 >

1.安装后进一步测试
600) makesmalpic(这个,600,1800);height = 415 src = " ephua/upload _ files/article/39/1 _ OE 4 GEF entitled-2 _ clip _ image 046 _ 0000 . jpg " width = 553 onload = " if(this . width/> 600)makesmalpic(this,600,1800);"border=1 >

22.测试gps导航
600) makesmalpic(这个,600,1800);height = 415 src = " ephua/upload _ files/article/39/1 _ yrx 2 wruntitled-2 _ clip _ image 048 _ 0000 . jpg " width = 553 onload = " if(this . width/> 600)makesmalpic(this,600,1800);"border=1 >

23.本田新crv专用主机安装后的效果
600) Makesmalpic(这个,600,1800);src = " ephua/upload _ files/article/39/1 _ 3 utrbirjul 2 _ _ 20093919122504 . jpg " onload = " if(this . width/> 600)makesmalpic(this,600,1800);"border=0 >
标题:【检修知识】本田新CR-V影音导航装置教程 地址:http://www.1803737.com//new/28946.html
特别声明:本站的所有文章版权均属于进口汽车配件网,未经本网授权不得转载、摘编或利用其它方式使用上述作品,违背上述声明者,我们将追究其相干法律责任。